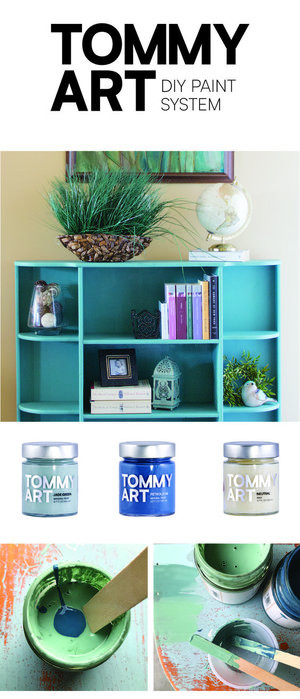
DIY Paint Color Mixing and Side Table Makeover
With the easily mixable colors in the DIY Paint System, a poorly painted treasure from a flea market can be transformed. In this tutorial, Lori Craig rescues a unique side table that had fallen prey to poor quality paint, then demonstrates how she mixed two Tommy Art colors to achieve the look she desired.

Supplies:
Soft bristle brush
Chippy bristle brush
Cotton cloth - old t-shirts work great!
Popsicle stick or paint stir

Assessing the mess
While the original blue color wasn’t a turn off, the poor paint job was. Notice in the upper right photo the thin layer of pale blue paint over the original lacquer finish and the over sanded edges that exposed bare wood. This piece was not shabby chic, it was just shabby.
Fortunately, I knew from previous completed projects that Tommy Art would not require any sanding of the cabinet and it would be the perfect one-coat coverage paint to take this project from shabby to shine in just a few hours.

Mixing colors
As I mentioned above, the blue color wasn’t offensive to me, but I really wanted something that leaned a little green and would look nice with the wheat painting hanging in my entry. Because Tommy Art paint products are all of the same base material, colors mix beautifully together. Mixing allows for creative expression, and it’s easy and fun!
For this project I chose Jade Green with the addition of several large drops of Petroleum. Be sure to stir each color well before you start mixing! In the above square on the right, you can see the pure Jade Green swatched and right above it, the custom mixture.
When mixing colors, it’s important to use your shade (darker) or tint (lighter) color sparingly from the start. You can always add more, but it’s difficult to lighten or darken if you’ve added too much of either. I started with a small “dollops” of color using disposable popsicle sticks in the plastic portion cup, stirring after each addition of the darker Petroleum. After a little experimenting, I knew the ratio for my desired rich blue-green color was 7 parts Jade Green and 2 parts Petroleum Blue.
Tip: This cabinet is 41” wide and 36” tall, and I was able to paint the entire surface with one 140 ml jar of Jade Green mixture. Be sure to mix enough paint prior to starting to ensure color match across the surface of the entire project.


I’ve included this photo because I wanted to share all of the fancy tools that I used on this project: clean popsicle sticks for dipping paint and stirring, plastic portion cups for testing a small batch of color mixing so I would understand the ratio of blue to green when I mixed the larger jar. Smooth and chippy bristle brushes. (not pictured: part of an old t-shirt that I ripped up for buffing the Neutral Wax in my final step)
Simple technique
The actual painting process with Tommy Art paints is easy. Long smooth strokes with a paint-loaded, soft bristle brush. The soft bristles allow for a smooth, rich coat of saturated color, with very minimal brush strokes.
I painted the cabinet in this order:
the exposed front of shelf edges
the back of the shelf unit
and finally, finish up with the flat surfaces, including the top.
Allow paint to dry thoroughly. (TIP: Feel painted surface with the back of your hand. If paint feels cool to the back of your hand, it is still wet). When dry, apply Tommy Art Neutral Wax to painted surfaces with a natural bristle, chippy brush for thicker application, allow wax to rest until it is not tacky to touch. Buff wax with a soft cotton cloth. Allow to cure over 24 hour period.
Enjoy.